Showing posts with label Holiday. Show all posts

Saturday, May 23, 2015

Memorial Day Cocktail | Citrus Shandy

When the weather starts getting warm, there is nothing more refreshing than a nice summer drink.  My go to is usually a nice, light wheat beer like Blue Moon.  I love how the traditional Blue Moon is served with a slice of orange.  I love the citrus flavor and tang that is added to the beer.


I got a little creative with my most recent Blue Moon.  I decided to make my own summer shandy using orange juice and clementines. 
If I am feeling a little adventurous, I have been known to mix my beer with lemonade.  This yields a deliciously tart beverage.


citrus summer shandy
1/4 cup of orange juice
1/4 cup of cold water 
1/4 cup of vodka
1 wheat beer
1 clementine, peeled and divided

Mix together the orange juice, water. sugar and vodka.  Put into serving glasses, about half way.
  Top glass off with beer and garnish with clementines.  

You can even squeeze a clementine for added flavor.  This made two cocktail sized beverages.


A delicious and light summer cocktail that is refreshing on the those hot summer days.  
Easy to take with you to the beach, pool or serve at a summer bbq.  


Friday, January 30, 2015

Shirley Temple Float | Valentine’s Treat for Two


This summer I discovered a delicious soda that is based off of one of my favorite drinks as a child.  When I was little and we would go out for dinner, my parents would always order me a Shirley Temple.  I felt like a grown up with this fancy pink drink in my hand.  The time has passed and I no longer order Shirley Temple drinks for myself, but I do order them for my children.  I will, however, sneak a sip when they are not looking.

This summer I saw in my grocery store a Shirley Temple soda made by Saranac.  Saranac is also known for its many refreshing and tasty crafted beers.  I was so excited to see this soda and could not wait to try it.  Fast forward a few months and this is the latest way I have been using Saranac Shirley Temple soda…


Shirley Temple Vanilla Float

1 bottle Shirley Temple Soda
1-2 scoops of vanilla ice cream
Frosty glass or mug

Scoop ice cream into a frosty glass or mug.  I really like a vanilla bean ice cream, which is sweet and creamy.  You can use any type of vanilla ice cream you prefer.  Pour the soda over the ice cream and watch it fizzle and cream together, instantly.  Make sure to have your straw and spoon ready.


It is magic in a glass.  It is creamy, sweet and refreshingly cold.  

This would be a great dessert after a homemade Valentine’s dinner.  Two people could share it with two straws!


Maraschino cherries would be a great addition, either at the bottom of the glass, on top or put on the straw…will have to try that next time!  

Monday, December 8, 2014

Cranberry-Orange Scones | More Holiday Baking

'Tis the season for baking...cookies, pies and scones.  This is a new recipe for our family that has quickly become a favorite.  It is delicious with coffee (for the grown ups) and hot chocolate for the kids.  These scones are quick to whip on the kitchen and add wonderful color to the table.  A great addition to any holiday breakfast for guests or yourself!


I have tried a few different scone recipes, as I think everyone has their own recipe they follow.  By  tweaking and combing parts of different recipes, I came up with this recipe.  I love that this recipe yields large and soft scones.
There is nothing worse that a hard, dense scone.

Cranberry-Orange Scones
3 cups of flour
1/3 cup of white sugar
1 tablespoon of baking powder
1/2 teaspoon of salt
11 tablespoons of diced, unsalted butter
2 eggs
1 cup of whole milk
1 cup of whole, fresh cranberries
The Glaze
3/4 cups of powdered sugar
Orange Juice-pour until desired consistency
Preheat oven to 400 degrees and line a baking sheet with parchment paper.
Combine flour, sugar, baking powder and salt in KitchenAid with paddle attachment (it will be best for the wet dough.)  Add the diced  butter to the dry ingredients and mix on low until the butter is mixed in and the mixture feels like the consistency of course sand. 
Whisk together the eggs and milk in a separate bowl (it will look like your are about to make scrambled eggs.)  Add the mixture slowly to flour mixture while mixing on low.  Turn off the mixer once added.  Fold in cranberries using a spatula or wooden spoon.

 The dough will wet.  Sprinkle some flour onto the counter and scrape dough out of the bowl and onto the counter.  Knead the dough a couple times and pat into a disk.  I love how you can see the color and shape of the cranberries in the dough.  It seem so natural and authentic.


Sprinkle some flour onto of the disk.  Cut the disk into pieces, like you would cut a pizza.  The kids were laughing saying I was making cranberry pizza! 

Place scones on the lined baking sheet and bake for approximately 15 minutes.  The tops should be golden brown and the scones puffed.  You will see some of the juices from the popped cranberries.

Just look at the thickness of the scones and the generous serving of cranberries in each piece!


While the scones are baking make the glaze by  stirring together the orange juice and powdered sugar.  Use a whisk and make sure the glaze is smooth, with no lumps of sugar. 


When scones are finished baking, let them cool slightly and then add the glaze by drizzling on top with a spoon. 


The scones were so delicious...sweet and tart from the sugar, cranberries and orange glaze.  I loved using fresh cranberries because of how they juiced and popped while baking.  I am think that next time I will add a bit of vanilla...

These scones are delicious and could be made for any breakfast, not just Christmas.  They would be lovely served at a brunch, bridal shower or baby shower.


Wednesday, December 3, 2014

Christmas Sugar Cookies & Decorating Tips

I love making Christmas sugar cookies.  I loved making them when I was younger and now as an adult, I love making them with my children.  Of course, sugar cookies are the best kind of cookie to give to Santa, too!

I have been following the same cookie recipe for years, which can be found here.  It makes a very sweet and soft cookie.  Make sure not to over bake it!

 It is so much fun to pick the different cookie cutters and to press them into the dough to make the shapes.

Decorating the cookies is even more fun because you get to decided what colors to use and any other added decorations such as sanding sugar or sprinkles.

I love having Christmas sugar cookies on hand during the holiday season.  It is such a joy for my kids to have a cookie after school or with some hot chocolate after playing outside.  But like I said before, they are good to have on hand for Santa on Christmas Eve.


I like using royal icing to frost my sugar cookies.  Make sure that when you are icing the cookies, the royal icing is able to fall back on itself and is not too runny.  You don't want it running off the cookie, but staying on the cookie and spreading itself out.

Royal Icing Recipe

3 egg whites
4-5 cups of powdered sugar

Using the whisk attachment in a KitchenAid or handheld mixer, beat the egg whites until they are frothy.

Slowly add in powdered sugar
and mix until smooth.  Depending on the consistency of the icing you may need to add more powdered sugar.  If it is too thick, dribble in a little water and mix until you think you have the right consistency.   

When the cookies are cool, they are ready to decorate.  Make sure they are completely cool, as any warmth will make the icing melt and run.  I like to have all my colors, bowls and piping bags laid out prior to decorating.  Keeping it organized and tidy will make the decorating process go much more smoothly.  I scoop out the icing and divide it up between bowls, then add my food coloring to make my colors.  I like the Wilton brand of gel colors, which can be found at Michael's craft stores.


To ice cookies with layers (like the reindeer and mittens) I did the light brown first, let it get hard and then do the next layer of icing, such as the collar, antlers and noses.  It is important to make sure the icing has set before adding the other colors, or else they will blend together.


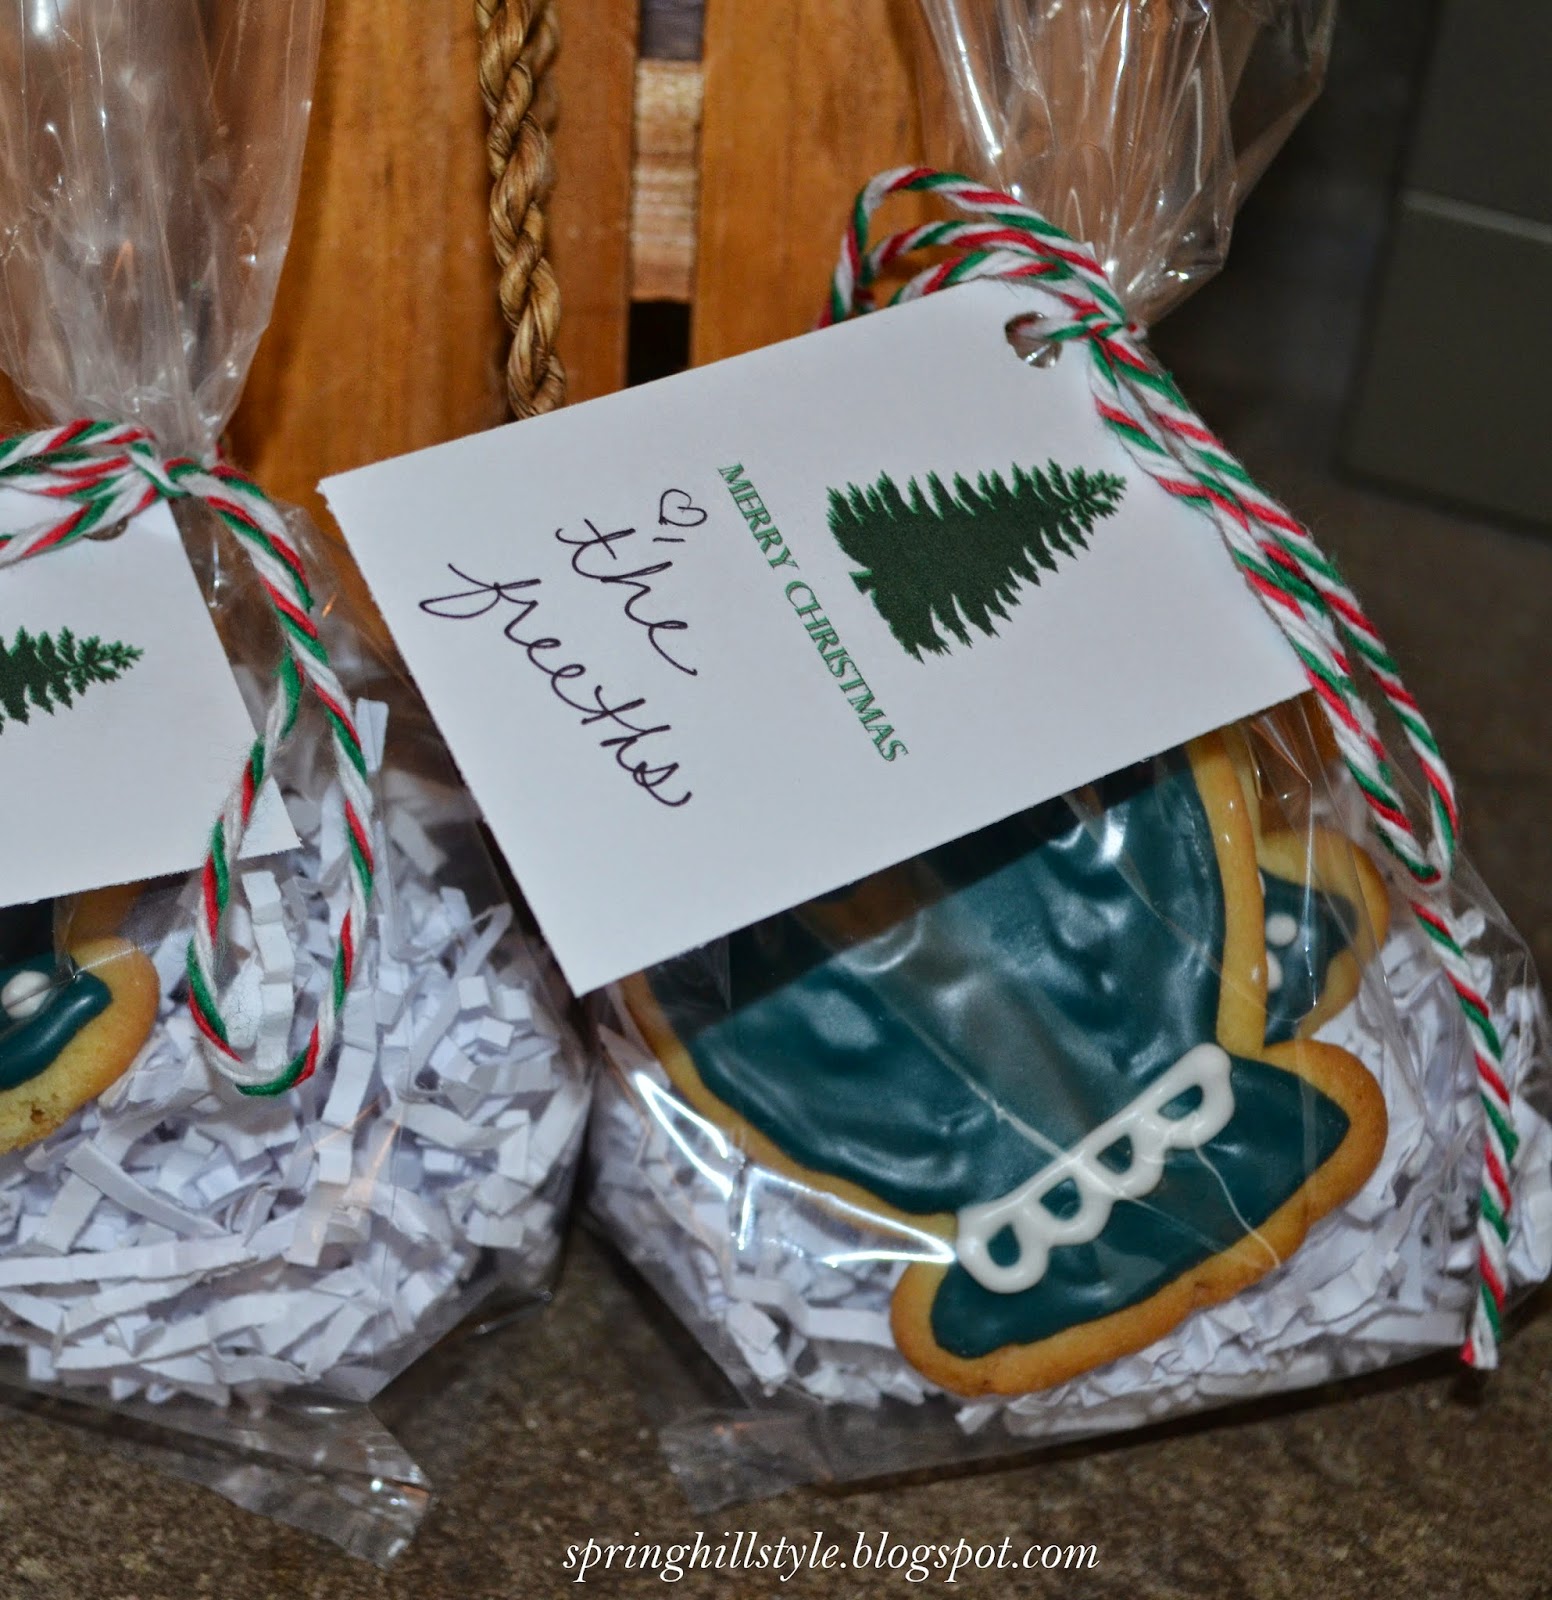
Packaged in cello bags with crinkle and my tags, ready to give to the neighbors.

I love making snowflake cutout cookies.  They are fun and easy to decorate.  With these cookies, I just make the royal icing without any gel coloring.

I add the first layer of white icing and make sure it sets.  Then I add lines of icing highlighting the fancy snowflake parts.  While still wet, I add I then add sprinkles and sugars.


They turn out beautifully...just imaging snacking on them with a big mug of hot chocolate!


Other Christmas sugar cookies that my children helped make...they insist on using a lot of color!  But as you can see, the possibilities are endless when it comes to decorating Christmas cutouts.


Tuesday, December 2, 2014

Christmas Packages | Gift Wrap Ideas

It is December!  Some people may have their shopping almost complete, while others may have just started.  Some people may still be in “list” making mode and trying to figure out who to purchase gifts for! 

I made my gift lists months ago and have been doing a little shopping here and there over the course of the last few months.  I don’t like to leave my shopping for the last minute.  I like to give myself plenty of time to shop and make sure that I get the right gift for the right person.  I also like to make sure I have plenty of time to wrap...no rush jobs!

Over the Thanksgiving holiday I started to organize my packaging and wrapping items.  I even started wrapping some gifts!  As I was working away happily in my own little world (with Christmas carols playing in the background), I thought to myself, “what a great blog post this would be!” 


 This year, my gift wrapping philosophy is to keep it simple, clean and classic...almost vintage with a modern twist.  I am keeping the wrapping paper simple by using solid colors like red and white, along with brown kraft paper (same color for gift bags) and of course, cello bags.


For decoration, I am using ribbon.  This year I am really into red plaid, cotton stitched, reds, whites and natural twine.  I think the simplicity of the wrapped packages under the decorated tree will look beautiful and stunning.  Almost too pretty to open!


What I really love about my gift wrapping this year are the tags I am using.  There was a preview of my tags at Thanksgiving (which doubled as gift tags and place cards, seen here.)  I wanted to do the same thing for Christmas and I had fun designing the tags by enlisting the help of my children.  I asked the kids what their favorite Christmas “things” are and from their answers, I came up with the tags.  I looked for images online and used my two favorite fonts-one of them is what I used for our wedding, almost 10 years ago.


My son loves to watch the “Reindeer Cam” app and that is how the reindeer tag was created.  My daughter loves snowflakes and loves to investigate each one with a magnifying glass, so the snowflake tag was created in her honor.  Both kids love to go sledding in our front yard, so I like to imagine they are the children on the sled tag.  My family has sold Christmas trees for many years (my parents have a Christmas tree farm) and so the tree tag represents our love of Christmas trees.  Lastly, the Santa tag…my children still believe in the magic of Santa.  This tag was created for them and the hope that they can still believe for a long, long time.  I think the tags are just darling!  A simple and sweet approach to labeling any gift, baked good or table setting. 


In my kitchen, there is a built-in desk with many drawers.  It is very handy and I have turned one of the drawers into where I hold my “stash.”  It is where I keep my packaging supplies like ribbon, tags, kraft bags, cello bags, crinkle, paper cutter and scissors.  It is very handy to have it all in one place and then I do not have to run around the house looking for everything.


This was my view while I was organizing and wrapping.  Such a picturesque winter scene!  


Happy wrapping!

Wednesday, November 26, 2014

Holiday Meal Leftovers | Traditions

Tomorrow is the big day!  Thanksgiving is here!  I am sure that everyone is busy in the kitchen cooking and baking or busy cleaning in anticipation of a houseful of guests.  This year we will be celebrating with my parents.  I am in charge of making the desserts, as my mom will prepare everything else.  This year she is trying her hand at homemade rolls and I can't wait to see how they turn out.  I will be making pumpkin pie and toll house pie (which I will share the recipe...someday!)

Over the weekend we had a small get together that we dubbed "Friendsgiving."  It was potluck style and just so much fun.  It was easy entertaining as I kept the food simple.  Some people brought a Thanksgiving style dish or a dessert.  Our children played and the adults sat and talked.  It was wonderful.  I wanted everyone to be able to have the option to take leftovers home, but wanted the leftovers to look appealing.  I did not want to wrap up leftover turkey in aluminum foil or put leftover scalloped corn in an old plastic butter tub!


I found these kraft "take out" boxes at Michael's craft store.  The labels I designed myself, based off of the Thanksgiving place cards I made, seen here in my table setting post.


I printed the labels off on whole sheet label paper then cut to the size I wanted.  It was very simple and took only a few minutes to make and assemble.  I left space on the label so a name could be added, for easy identification in the fridge!


I like the idea of providing a "cute" container for leftovers.  It makes the leftovers seem ever more special.  After each guest filled their boxes, I tied them with twine, to add extra character (and to make sure the top was secure...I did not want anyone losing any of the food!)


I truly enjoy Thanksgiving and am looking forward to tomorrow.  I love this holiday and all that it stands for-family, traditions and blessings.  I love getting up early with the children to watch the Macy's Thanksgiving Day parade-making numerous phone calls to my mom to tell her to watch the parade, even though I know she is busy cooking.  We will have our wonderful dinner around mid-day and then relax, with dessert later in the day.  In the evening, when it is dark, we turn on our outdoor Christmas lights and window candles to celebrate the beginning of the Christmas holiday. 

Happy Thanksgiving and have a wonderful day with your family and friends! 

Saturday, November 22, 2014

Petite Pumpkin Pies with Spiced Whipped Cream | Thanksgiving Tablescapes


With Thanksgiving just around the corner, I have been experimenting with desserts and decorating the table.  That last week has been busy!
I decided to put a spin on the most traditional Thanksgiving dessert, the pumpkin pie.  I did not change the ingredients of how I make the pie, I just changed the serving size and the topping.  My petite pumpkin pies are adorable and tasty, as well as the perfect serving size after a large Thanksgiving dinner. 


These little pies hardly took any time to prepare, bake and eat!  I think they were easier because I did not have to “blind bake” the pie shell, like I would if I was making the traditional pumpkin pie.  In the spirit of my grandmother, I made my own whipped cream, but added some special spices for more added flavor.  The spiced whipped cream was nutty and spicy, the perfect flavor combination with the creamy pumpkin pie. 


Petite Pumpkin Pie with Spiced Whipped Cream

1 can (15oz) of Pumpkin Pie

1 can (14 oz) of Sweetened Condensed Milk

2 eggs (room temperature)

1 tablespoon of Pumpkin Pie Spice

-----------------------------------

¾ cup of chilled heavy cream

2 tablespoons sugar

¼ teaspoon of ginger

½ teaspoon cinnamon

For this recipe, I used premade, store bought pie crusts (2 rolls).  Make sure that you let them sit out until they reach room temperature.  If you don’t, they will crack when you unroll them.  If you choose to use homemade crust, that would work well too.  I actually have a wonderful crust recipe that I will be sharing soon.
Preheat the oven to 425 degrees.  Spray the muffin tin with cooking spray.  Once the dough is at room temperature, cut out 4 inch circles.  I used a bowl, but feel free to use whatever instrument you have that will give you a 4 inch circle.   Place the dough into the muffin tin.


Mix together pie ingredients, making sure well incorporated.  Spoon mixture into the dough cups.  Bake in over for 15 minutes.  Reduce the oven temperature to 350 degrees and bake for another 20-25 minutes, or until a toothpick inserted in the center of the petite pies comes out clean. 


Allow the petite pies to cool in the muffin tin for about 30 minutes, the take out the pies and place on a wire rack to continue cooling.  Once cooled, serve immediately or chill.


While the pies are baking, make the spiced whipped cream.  I like to make sure the mixing bowl is chilled, so I will place cold water and ice inside and place it in the fridge for 10-15 minutes.  I make sure it is dry before I begin making the whipped cream.  Any additional moisture will make the whipped cream runny. 

Beat the heavy cream, sugar and spices together in the bowl until soft peaks form.  Put in a glass bowl for storage in the fridge, or serve immediately on top of petite pies.
These petite pies are a lovely addition to any dessert table during the holidays.  They are also great wrapped up for leftovers if some of your guests have other places to visit on Thanksgiving.  It is always nice to give your guests some treats to enjoy later on...a little midnight snack of pumpkin pie is always fun! 

Here you can see some of my packaging techniques that I use to make the "doggie bags" more personal and festive.  I like to create tags for the different holidays or gifts I give to family and friends.  Here are my special Thanksgiving tags, which can also double as place setting cards.


I have been playing with two different tablescapes for Thanksgiving day.  I love both for different reasons and I am having a hard time deciding on which one to pick for Turkey day.  For the first display I used one of my favorite decorating items, the wooden box.  My dad made this for me and I have used it numerous times.  Most recently this spring will a display of daffodils.

I love being able to reuse items in different ways, as I have done with the box and also the burlap runner (which also was on the table for spring.)  The natural color of the wood box and the burlap runner really highlight the browns of the Thanksgiving.  I love how the pumpkins and gourds pop against the brown of the table, napkins and chair covers.  The creaminess of the candles (from Williams-Sonoma, a million years ago!) and my new natural candle holders (purchased from Hobby Lobby in the paintable wood section) really add an element of elegance. 
My second table highlights that bounty that is Thanksgiving.  The pewter bowl is an heirloom from my grandmother.  I love it and it has such versatility.  In the bowl I stacked guards, pumpkins and apples, which are all fall foods that are incorporated in Thanksgiving day food.  Again, I am using my burlap table runner (made by my mom for a bridal shower!) but dress it up with some additional pumpkins and some bundles of wheat (purchased a couple years ago from curiouscountrycreations.com.  Martha Stewart is also a patron!)  I love how the centerpiece is rich in a variety of natural fall colors, without being too over the top.  The wheat adds a sense of simplicity while the bowl adds a touch of sophistication.  I love the balance between the two concepts.
In the photos you can also see the seating cards, which I made.  They are very simple and with a little graphic and saying.  I think they add a touch of whimsy, while also giving a very important direction-where to sit to eat!  It is nice to know where you are sitting, as it prevents confusion for guests and people will not roam about the table looking for a place to sit.  Seating cards are another good way to strategically place people to help foster conversation, especially if you have guest who may not know everyone or if you have guests that like to talk about certain topics, such as sports, politics, etc.  You can group the people together who like talking about the same things.


The napkin ring holders were another Hobby Lobby find, in the same section as the candle holders.  I thought they were so pretty and would look fabulous on the Thanksgiving table.  When I purchased them, I knew I would be using the deep brown linen napkins.  The natural wood napkin rings are elegant and minimal, adding style to the table.

I hope in the next few days to share a few Thanksgiving recipes.  I have been thinking and rethinking the menu and have been making endless grocery shopping lists for the past couple of days now.  I am excited for next week’s meal.  Thanksgiving is a wonderful time!